

How to Run Boost.Beast with Visual Studio Code and CLion on Debian
Beast is a C++ header-only library serving as a foundation for writing interoperable networking libraries by providing low-level HTTP/1, WebSocket, and networking protocol vocabulary types and algorithms using the consistent asynchronous model of Boost.Asio.
Beast, created by Vinnie Falco, is part of Boost C++ Libraries. In this tutorial, I am going to show you how to run a Boost.Beast sample code with VSCode and CLion on Debian 9.
Install Boost on Debian 9
At the time of writing, the default repo of Debian 9 only supports Boost 1.62.0, where the newly developed Beast lib has not been added. Fortunately, we can install relatively newer version of Boost 1.67.0 loaded with Beast through Debian backports.
In case you do not have backports enabled yet, create a file named backports.list in /etc/apt/sources.list.d/.
sudo touch /etc/apt/sources.list.d/backports.list
Add the following into this file.
deb http://deb.debian.org/debian stretch-backports main contrib non-free
Great! Let us install Boost 1.67.0 on Debian 9 by running the following command.
sudo apt update
sudo apt install -y -t stretch-backports libboost1.67-all-dev
Sample Code
We can download a piece of sample code (websockets client sync 1.67.0) here. We are going to use this code test our setup later. For now, let us just create a folder named beast_demo, save and rename this file to beast_demo.cpp.
mkdir beast_demo && cd beast_demo
wget https://raw.githubusercontent.com/boostorg/beast/boost-1.67.0/example/websocket/client/async/websocket_client_async.cpp -O beast_demo.cpp
Visual Studio Code
For those who have followed my previous post on “How to Run and Debug C++ with Visual Studio Code on Debian”, you should be able to set up C++ development environment in VSCode with ease.
However, there are still some minor adjustment we need to make before we can use boost.beast library. Initiate Command Palette by Ctrl + Shift + P and search Open User Settings. If you would like to make this change globally, click the curly bracket on the right corner. In case you prefer this change only within the current workspace, select Workspace tab first and then click the curly bracket.
Locate the code block.
"code-runner.executorMap": {
    "cpp": "cd $dir && g++ -std=c++14 $fileName -o $fileNameWithoutExt && $dir$fileNameWithoutExt"
},
Replace it with the following.
"code-runner.executorMap": {
    "cpp": "cd $dir && g++ -std=c++11 -lboost_system -lssl -lcrypto -pthread $fileName -o $fileNameWithoutExt && $dir$fileNameWithoutExt"
},
If the code block mentioned-above is not present, just simply append it.
The additional flags (-lboost_system and -pthread) are meant to address two compiling errors I have encountered.
undefined reference to `boost::system::system_category()’
undefined reference to symbol ‘pthread_condattr_setclock@@GLIBC_2.3.3’
Reference:
- Linker error: undefined reference to symbol ‘pthread_rwlock_trywrlock@@GLIBC_2.2.5’
- C++ Boost: undefined reference to boost::system::generic_category()
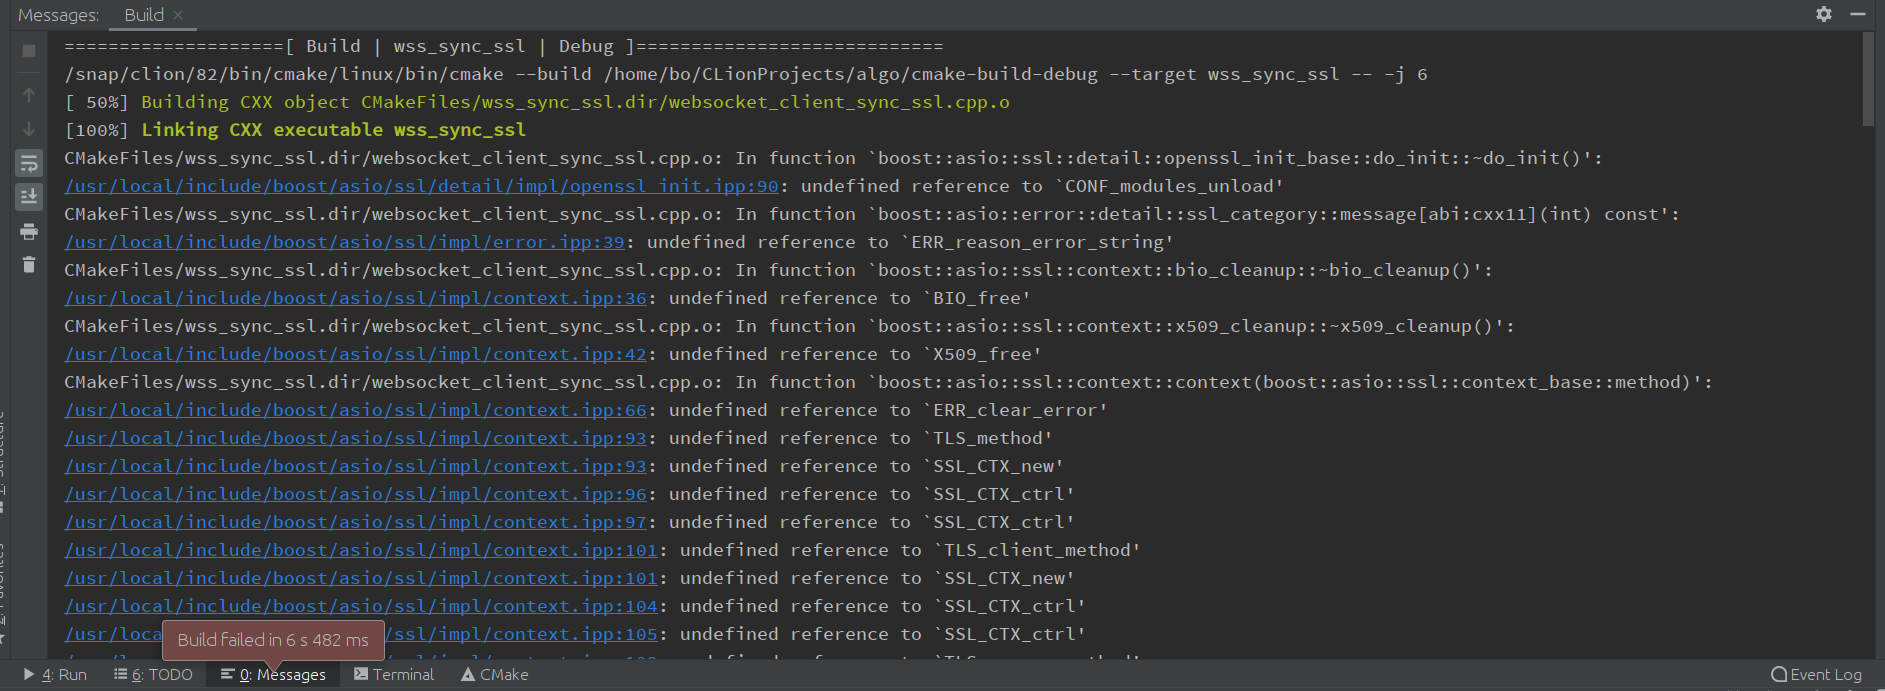
Add those two flags -lssl -lcrypto if you have an error message like this
Reference:
In addition, you might need to check if Secure Sockets Layer toolkit has been installed yet.
sudo apt install -y libssl-dev
If all goes well, now you can build beast_demo.cpp by clicking code-runner “Play Button”. Here is the response from my terminal.

CLion
CLion is one full-fledged C++ IDE, where a larger code base can be easily handled with more advanced features. By default, CLion provides CMake as the project model. In our case, we can simply replace the content in CMakeLists.txt with the following.
cmake_minimum_required(VERSION 3.14)
project(beast_demo)

set(CMAKE_CXX_STANDARD 14)

set(CMAKE_CXX_FLAGS "${CMAKE_CXX_FLAGS} -lboost_system -lssl -lcrypto -pthread")

# Boost
# Find Boost headers and some static (release only) libraries
set(Boost_USE_STATIC_LIBS        ON)  # only find static libs
set(Boost_USE_DEBUG_LIBS         OFF) # ignore debug libs and
set(Boost_USE_RELEASE_LIBS       ON)  # only find release libs
set(Boost_USE_MULTITHREADED      ON)
set(Boost_USE_STATIC_RUNTIME    OFF)
find_package(Boost COMPONENTS ...)
if(Boost_FOUND)
    include_directories(${Boost_INCLUDE_DIRS})
    add_executable(beast_demo main.cpp)
    target_link_libraries(beast_demo ${Boost_LIBRARIES})
endif()
Notice, both C++11 and C++14 should be working in our setup.
Newer Boost.Beast Library
Here comes the question.
Is it possible to use a newer version of Boost.Beast (1.71.0 at the time of writing) in our setup?
Before we install the newer version of Boost, let us remove the older one first.
sudo apt remove -y libboost1.67-all-dev sudo apt autoremove -y
If you need to build Boost with unicode support, run this command below.
sudo apt install -y libicu-dev
Now we can get the latest version of Boost from its official download page.
cd Downloads
wget https://dl.bintray.com/boostorg/release/1.71.0/source/boost_1_71_0.tar.bz2
tar xv boost_1_71_0.tar.bz2
cd boost_1_71_0
In this directory, we can find a buidl configuration script called bootstrap.sh, which is used to generate b2 program.
./bootstrap.sh --prefix=/usr/local --with-python=python3 --with-icu
The --prefix=/usr/local tells the location where Boost will place the files it builds. Additionally, our build will also have Python 3 and unicode support by --with-python=python3 and --with-icu, respectively.
The actual build starts by running this command.
sudo b2 install
Uninstall what we just installed?
You got it!
sudo rm -r /usr/local/include/boost
sudo rm -r /usr/local/lib/libboost*
I hope you liked this short tutorial. Stay tuned by signing up for my newsletter. If you have any questions/comments/proposals, feel free to shoot me a message on Twitter/Discord/Patreon.
Happy coding!